
This blog has been written by Glam Adelaide’s Editor, Kelly Noble and republished from her blog: http://kelly-noble.tumblr.com
It’s all done! After spending yesterday putting everything together, our courtyard transformation has been completed with little to no fuss. And we love it. If you missed my first post about the preparation we did for our new Woolly Pocket vertical garden (framework, plant selection etc), check it out here, otherwise read on for how yesterday went down.
Just to recap, here’s the before photo:
And here are the steps we took yesterday (after completing the framework a couple of weeks ago)
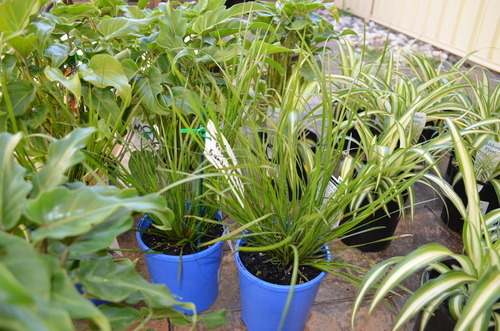
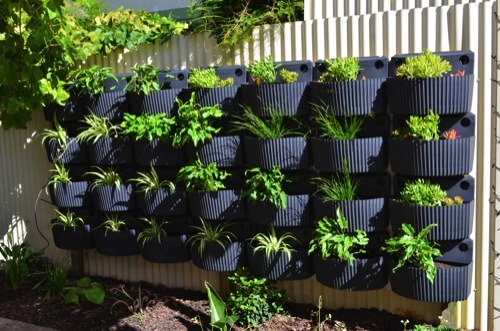
The plants arrived. We had chosen a design which included grasses, spider plants, succulents and Xanadu plants. We used one plant per planter (except the succulents which had a couple of tiny friends included on either side of the main plant).
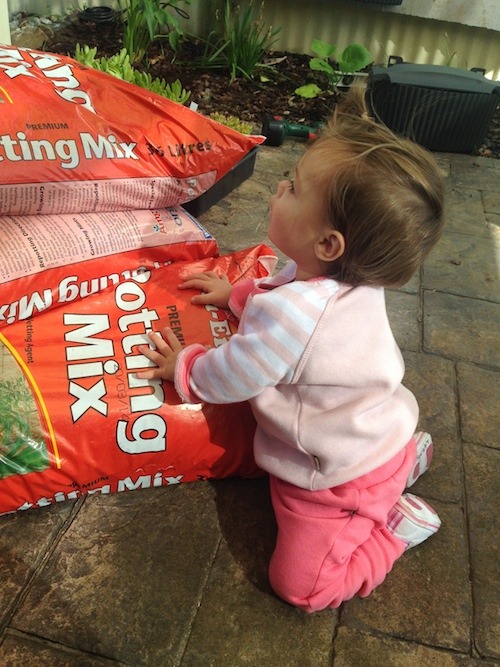
We used about 10 bags of potting mix for 28 planters. Depending on the size of your plants (and the roots/dirt they come with) you could use one bag of potting mix per 2-4 planters. My one year old was extremely helpful as you can imagine… haha.
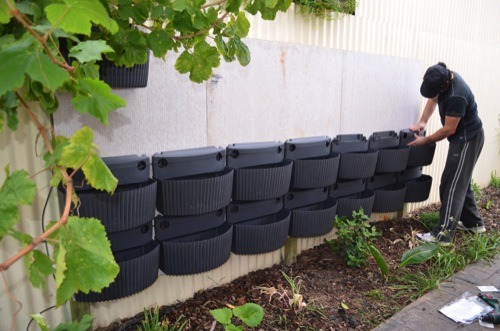
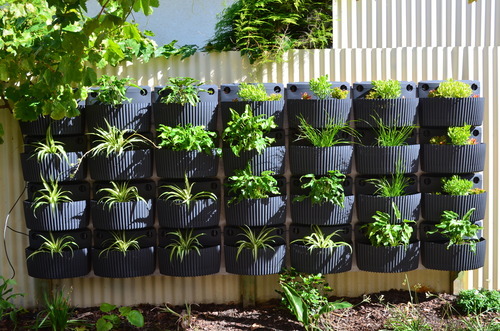
Starting at the bottom, we used an electric screwdriver to attach each Woolly Pocket planter to the framework we had installed. Two screws per unit was all it took, and the use of a spirit level to keep things on track. We also used the spirit level between each row as a spacer which was quite handy. You could easily spread them out more, but our framework design was all about packing as much punch into the space as possible.
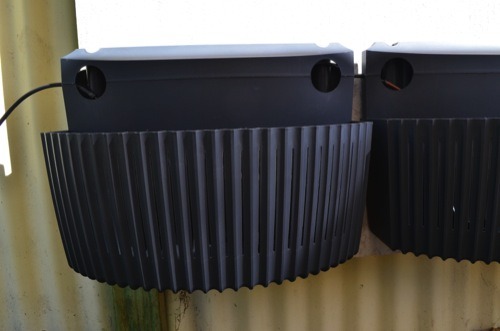
Each unit comes with it’s own drip irrigation, which simply drops into the top of the unit, and then the top cap clips in over it. They connect together with a small valve so you can have as few or as many as you want and you’ll never need to worry about watering them!
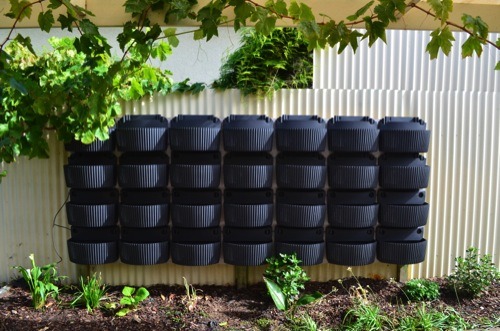
The finished wall of Woolly Pocket planters looked pretty cool on its own. A sculptural statement just waiting for you to put your own mark on it. We chose the dark grey units but there are plenty of other colours to choose from including orange and white!
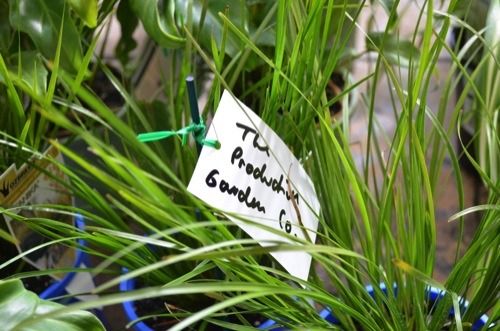
The amazing team at The Productive Garden Co organised all the products and design for us, and they talked us through the steps for setting everything up. Like some DIY miracle however, we did actually manage to do it ourselves (which shows you that you don’t need to be a gardener or handy to put it all together!) It’s actually pretty simple if you follow the instructions.
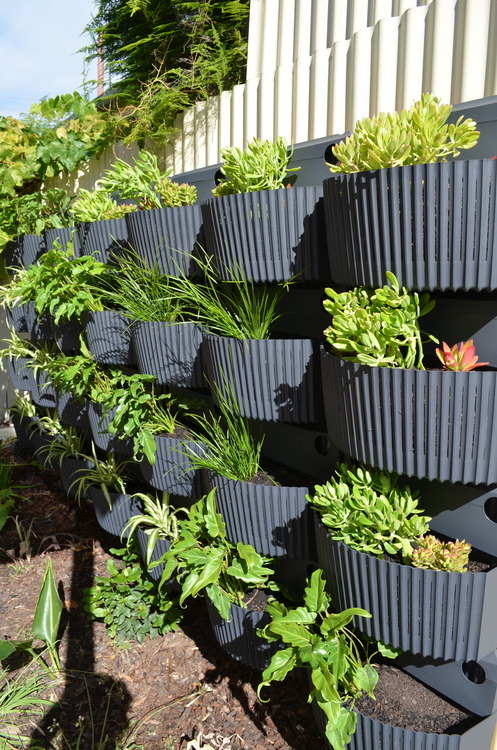
We planted all of the plants in the front half of the unit so the planters on top wouldn’t crush the leaves and angled them all forward, which allows us to see all of the leaves & foliage. It seemed to work well.
You actually unclip the planter from the wall and plant it out on the ground, which is way easier than doing it on the wall. Then you just clip it back onto the wall. This will be really useful if we ever need to replace any plants in the future.
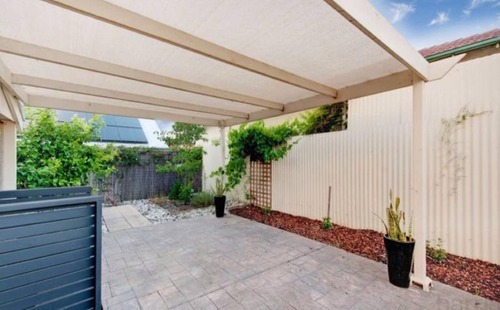
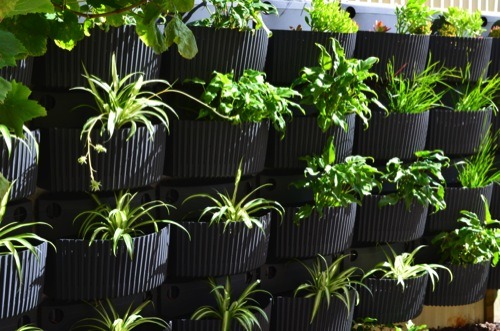
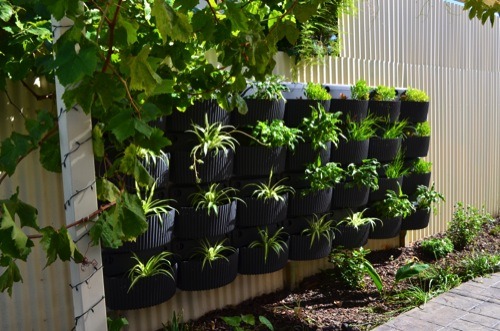
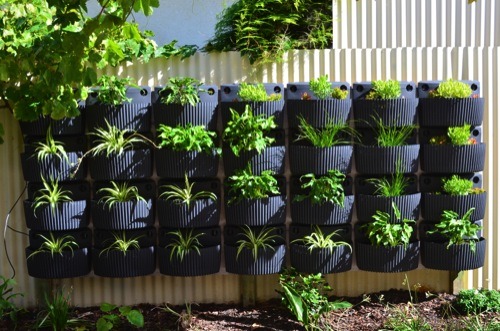
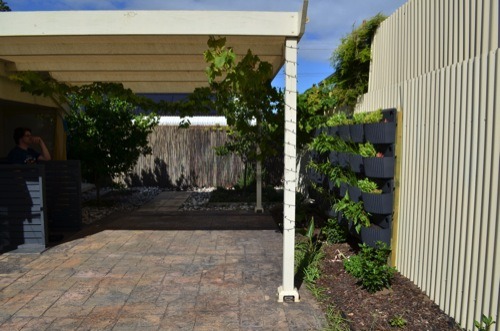
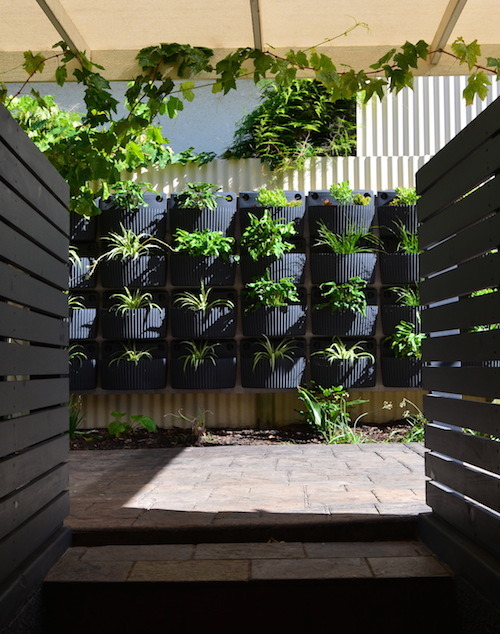
Here are some of the finished photos including our new view from the back of the house!
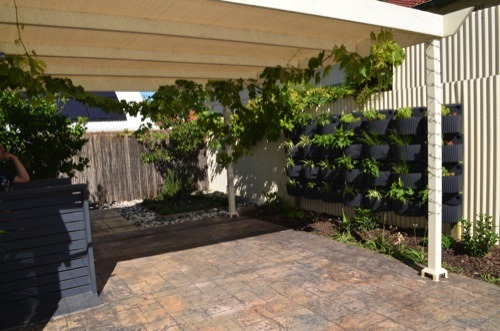
The best thing about the design of the planters, is that they have a two inch water reserve area in the bottom so they can hold some water for the plants, and when the water level gets higher than that, it will drain out of the slits through the front of the unit. If you stack them one on top of the other as we have, the excess water runs down into the unit below and so on. Very efficient for when it rains (and for when we use the irrigation system).
Now we just need to fix up the existing garden bed, pressure wash the old concrete paving, plant our grass & trees and the list goes on…
At least we don’t have to wait to enjoy our ever changing view as our Woolly Pocket vertical garden establishes itself and grows into a beautiful work of art!
You can buy Woolly Pocket Living Wall Planters and the irrigation systems from http://www.woollypocket.com.au
If you want someone to organise everything for you instead, go and see the guys at http://productivegardenco.com.au
This blog has been written by Glam Adelaide’s Editor, Kelly Noble and republished from her blog: http://kelly-noble.tumblr.com
More News


